We've recently had a few customers reporting difficulties with using their Windows 10 systems to communicate with their SDA units. This solution aims to guide you through the process of installing the SDA software tool onto your Windows 10 tablet/ PC/ Laptop and getting it to communicate with your device.
The first (and arguably most important) step would be to download and install Windows Mobile device center.
You can find this by navigating to https://www.microsoft.com and searching for Microsoft Windows Mobile Device Center 6.1 Driver for Windows Vista (64-bit). Alternatively, click this Link. (Please email support@analox.biz if this link doesn't work and we'll update it).
Once downloaded, open the drvupdate-amd64.exe file and follow onscreen prompts

Right-click on the Windows 'Start' button and

Open Computer Management

Open Services & Applications

Open Services
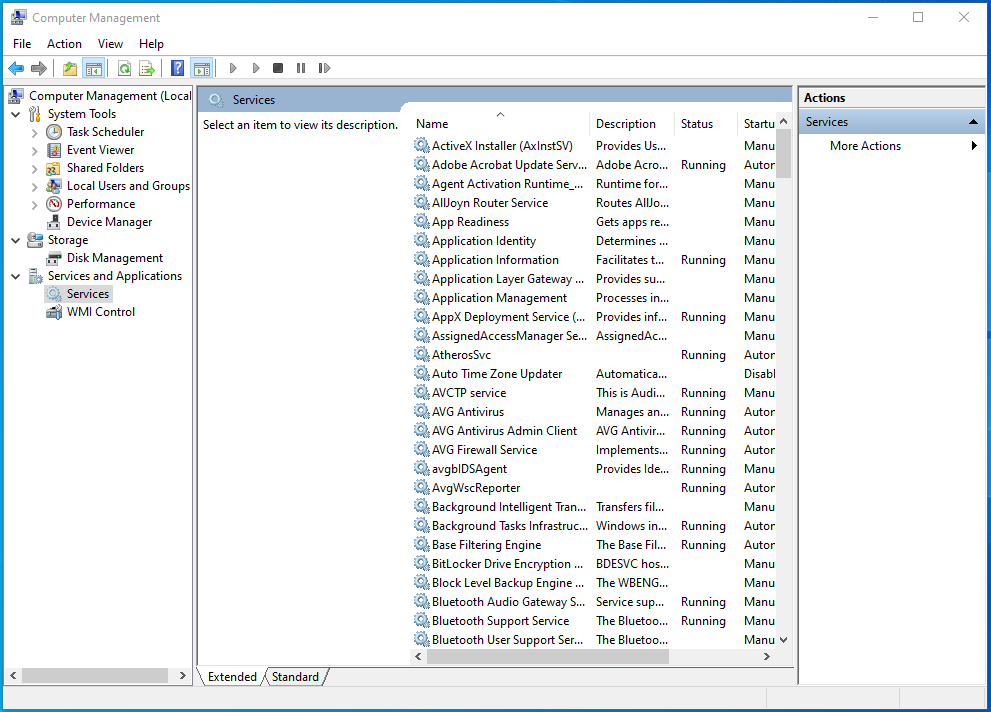
Scroll down to right-click on "Windows Mobile-2003-based device connectivity"
Select Properties
Select Log On
Switch to "Local System account" with checking "Allow service to interact with desktop"
Click OK
Insert the CD provided with your SDA device into your system optical drive and run the setup file

Follow onscreen prompts to install the SDA Software


Microsoft has added protection against drivers without signature verification, to proceed you will need to temporarily disable driver signature verification.
Click the start button or Press the Start Button on the keyboard, click on power, Hold Shift Key and click on restart.

Click on Troubleshoot

Click on Advanced options

Click on Startup Settings

Click on Restart

Select the 7th option, press 7 or F7 key on your keyboard to select the ‘Disable driver signature enforcement’ option.

Once your computer has rebooted, switch your SDA on, enter the Main Menu, scroll down and select the power menu, select sleep


Connect your SDA to your PC via the provided USB cable and switch the SDA on


Right click your ‘This PC’ icon and select properties

Select ‘Device Manager’

Right click the ‘Yellow’ device and select ‘update driver software’. Should be located under the ‘Other devices’ heading

Select the ‘Browse my computer for driver software’ option

Select the ‘Browse’ option

In the resulting window, open the software disk drive and select the ‘Drivers’ folder, then click ‘OK’ and ‘Next’. A windows security pop-up will appear, select the ‘Install this driver software anyway’ option

You should get a ‘Windows has successfully updated your driver software’ message, click close.

Windows mobile device center should now automatically open. On the first connection the device center will ask you to accept their license terms. Click ‘Accept’

Minimise the Windows Mobile device Center window and open the SDA Setup software

Congratulations, you have successfully setup the SDA Setup tool on Windows 10